

Create a Facebook Business Page with this illustrative step-by-step guide and boost your social media visibility for your construction contractor business.
How to Create a Facebook Business Page Step-By-Step Guide
There comes a time in every business’s life when old school marketing and word of mouth efforts just aren’t enough. The time to take your business digital is now. We like to start with social media, specifically Facebook. Even if you don’t yet have a webpage, a Facebook business page can serve as a temporary stand-in. A Facebook business page branches off from a personal Facebook account, but offers a space unique to just your business. Here you can showcase the services you provide, show price estimates, promote reviews, and display pictures of prior projects. Best of all, having a page for your business is completely free.
When you are ready to spend some money, Facebook advertising is a great tool that works in concert with your business page to help you ramp up your digital marketing.
The following is a step by step guide to setting up a Facebook business page for your contracting business on a desktop computer or laptop.
Set Up
1. Set up a personal account on facebook.com. (If you already have a Facebook account using a personal email, you can log in and skip to Step 3) To do this, enter your information on the “Sign Up” form on the homepage. We suggest using your business email. Pick a password you’ll remember and store it safely offline.
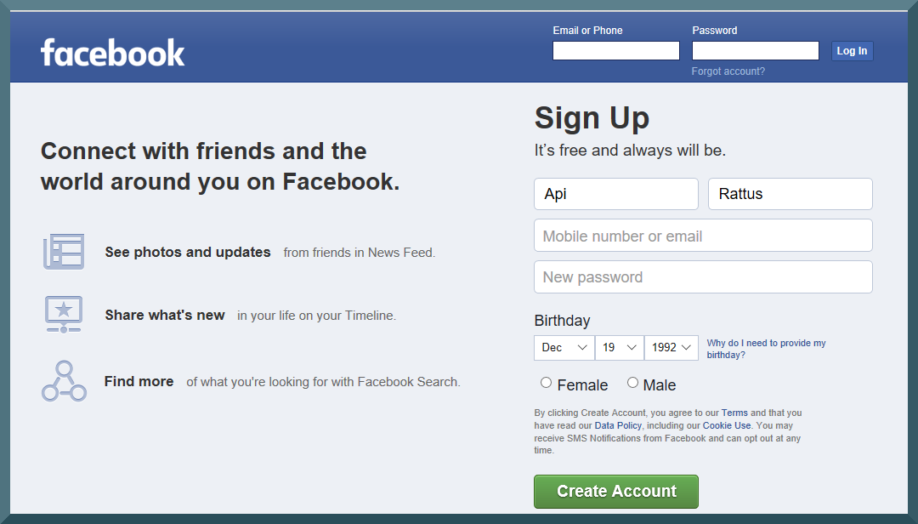
2. Confirm your email. Gmail allows you to do this automatically on the prompt page. Other servers will require you to verify your email by going into your email inbox, opening the message from Facebook, and clicking the verify link within it. This will then route you to your personal account’s homepage.

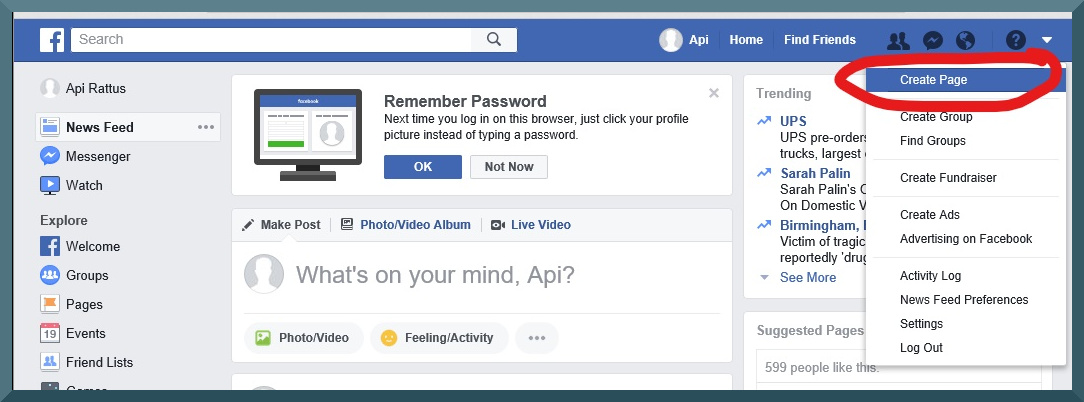
3. Click the upper right arrow of your homepage, next to the help icon. Select “Create Page” from the drop-down menu.
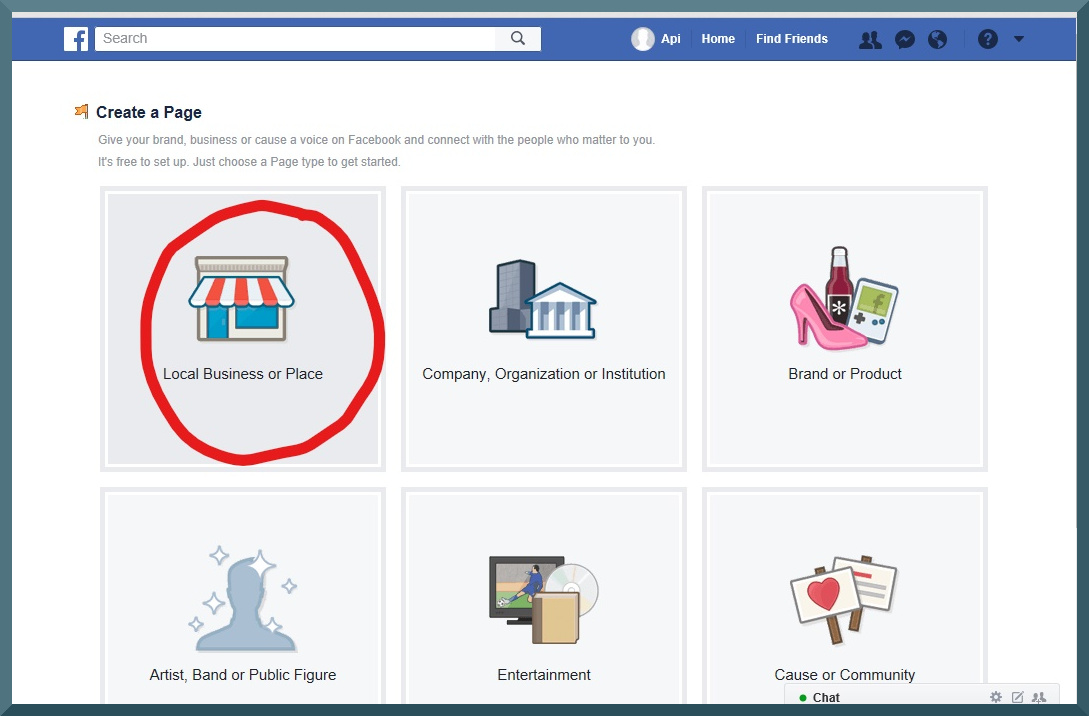
4. Click “Local Business or Place” on the Create a Page menu.
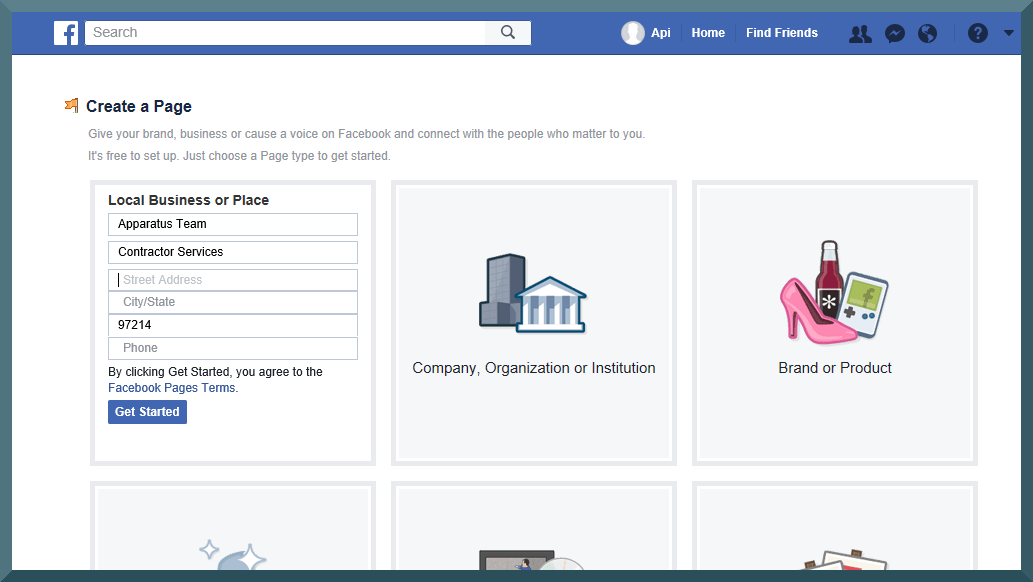
Enter your business information into the empty fields that appear.
How to Create a Facebook Business Page – Customize Your Page
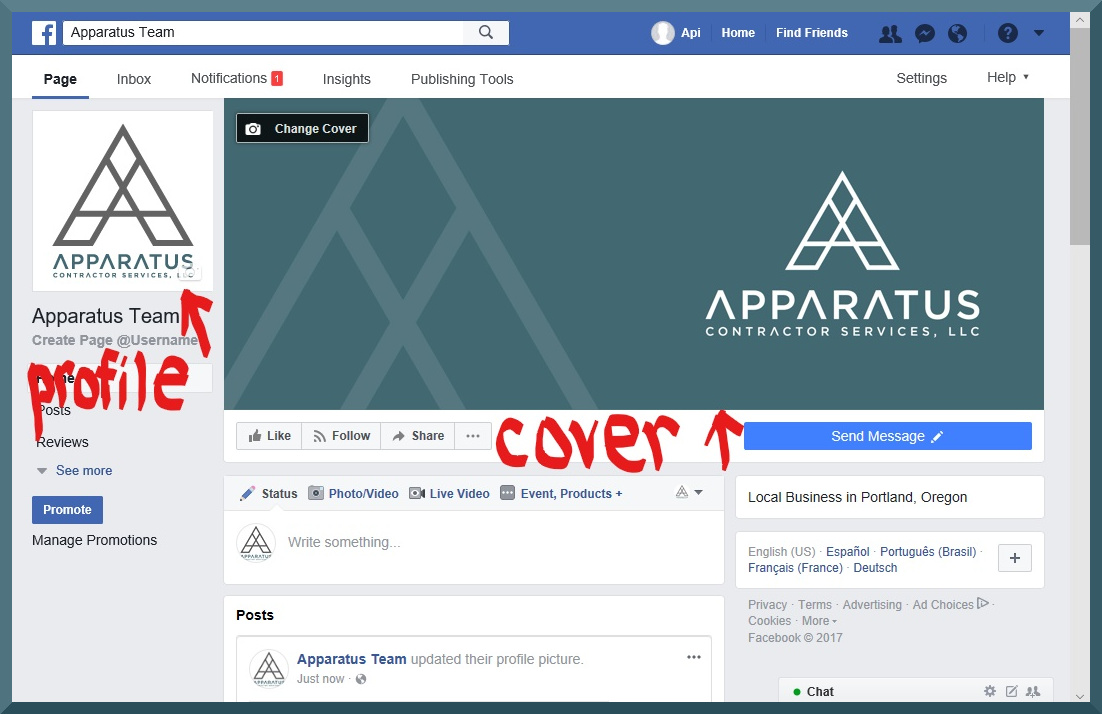
5. Upload your profile picture and cover photos. The profile picture should not be a personal picture or selfie. If you have a logo, use it here. if you’re not yet branded, use a picture that would be the most descriptive of your service, ideally one you have taken yourself of a job site or project.
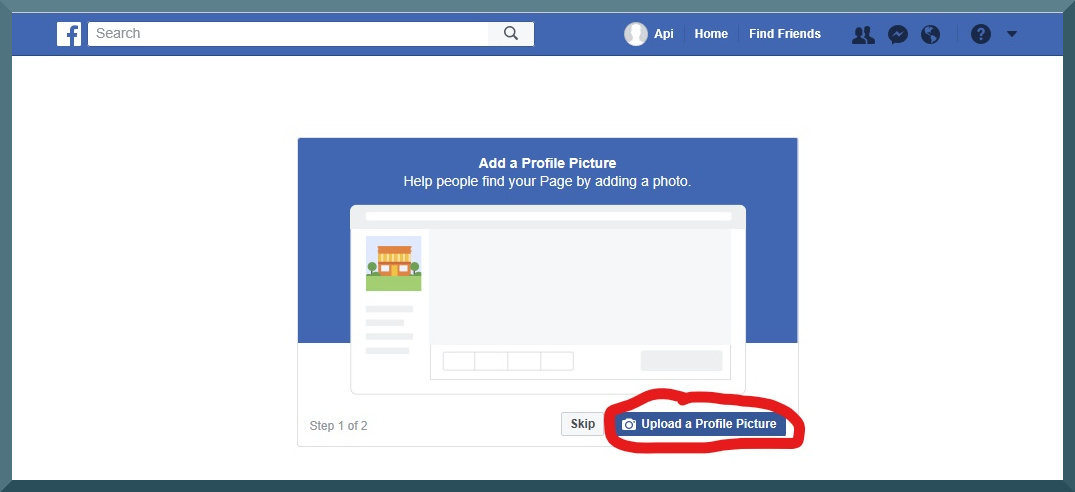
Your profile picture appears as a small icon while your cover picture appears as a banner at the top of your page.
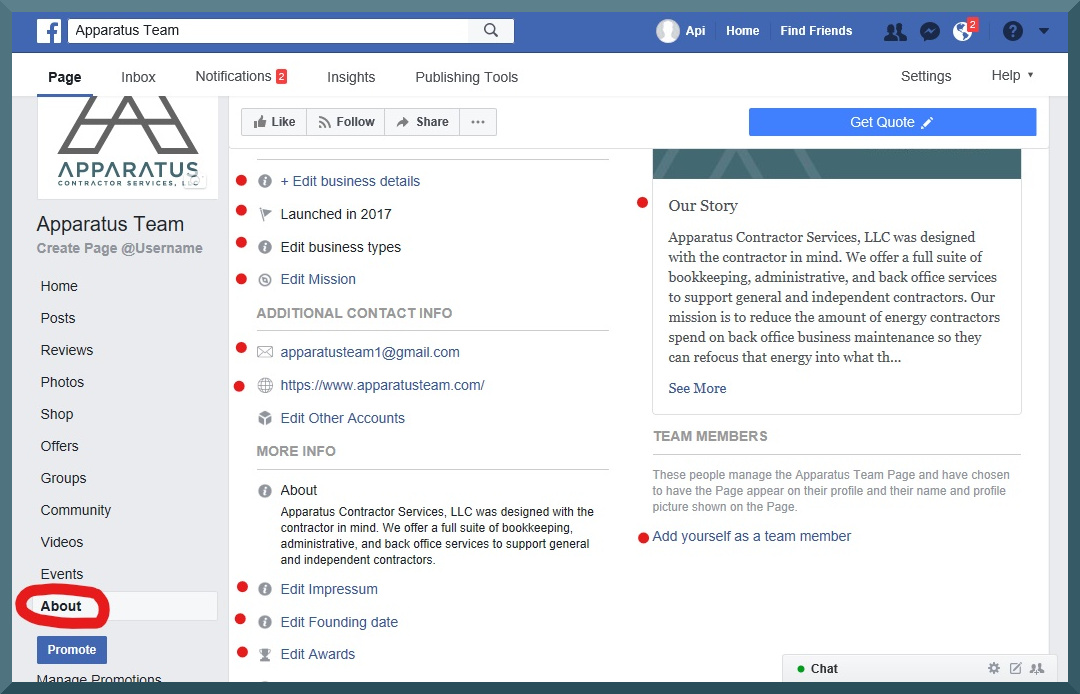
6. Click “See more” in the left-hand menu column.
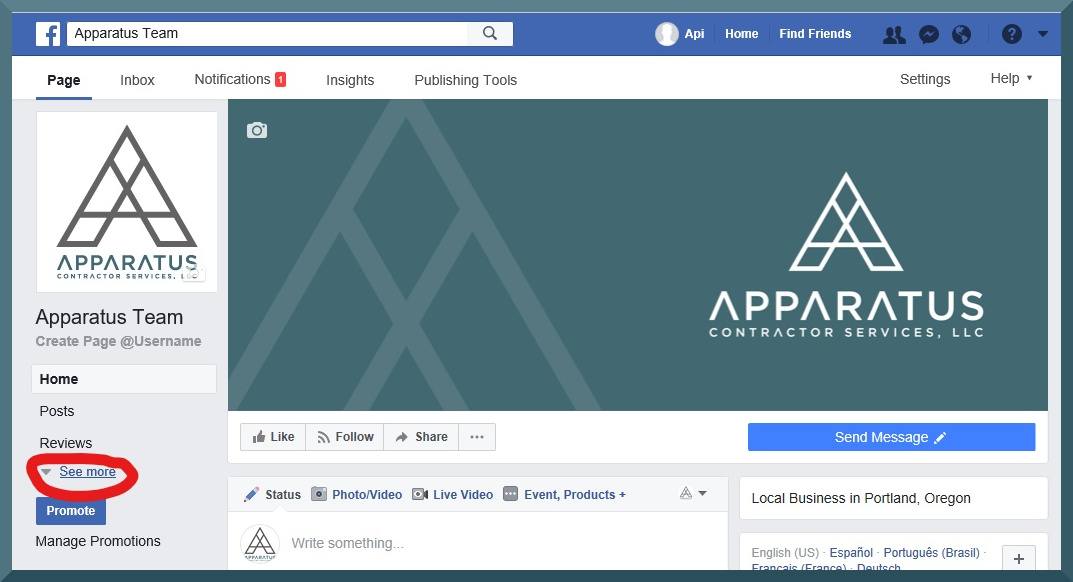
Click “About” at the end of the list that appears. This will display a hub of empty fields which you can fill with your business information. Many fields such as email, website, price range, and hours are self-explanatory. We encourage you to fill out as many fields as you can, and work to make them relevant to your business even if it seems like you could leave them blank.
Save all changes and when finished return by clicking the “Home” tab on the left-hand menu column.
Get Leads
7. Click your call-to-action button to customize it.
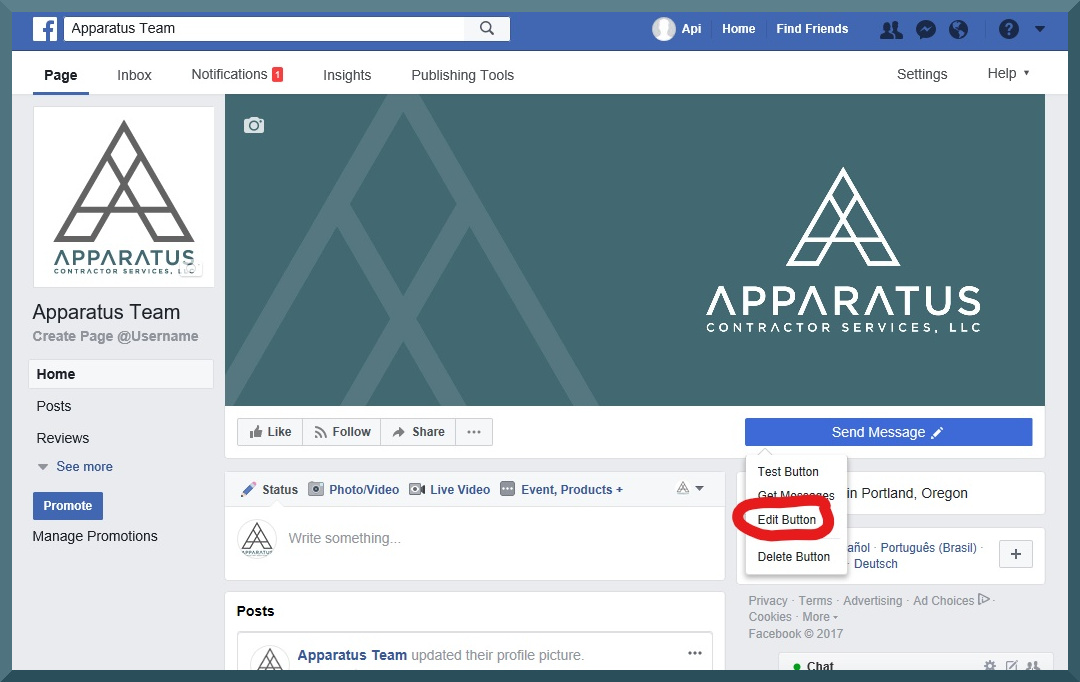
You can choose from a variety of button options based on your business and its needs. We chose “Get Quote” since many contractors will benefit from this option.
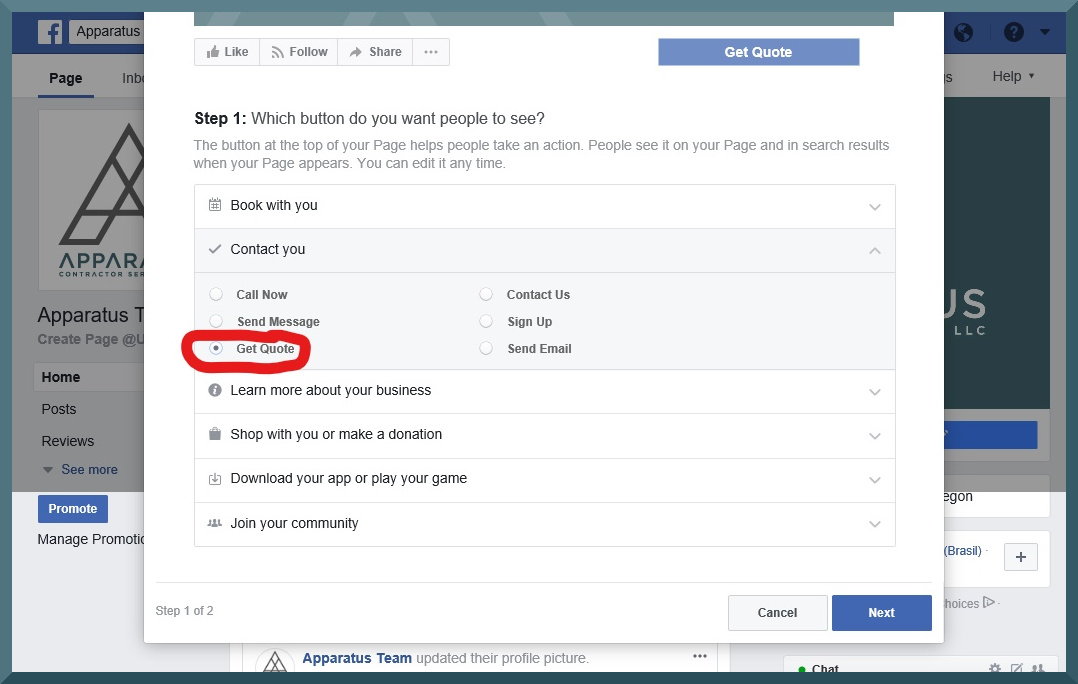
If you did not choose “Get Quote” as your call-to-action the following step may be disregarded.
8. Click “Create a form for people to fill out” on the next screen. Whoever clicks your button will be presented this form.
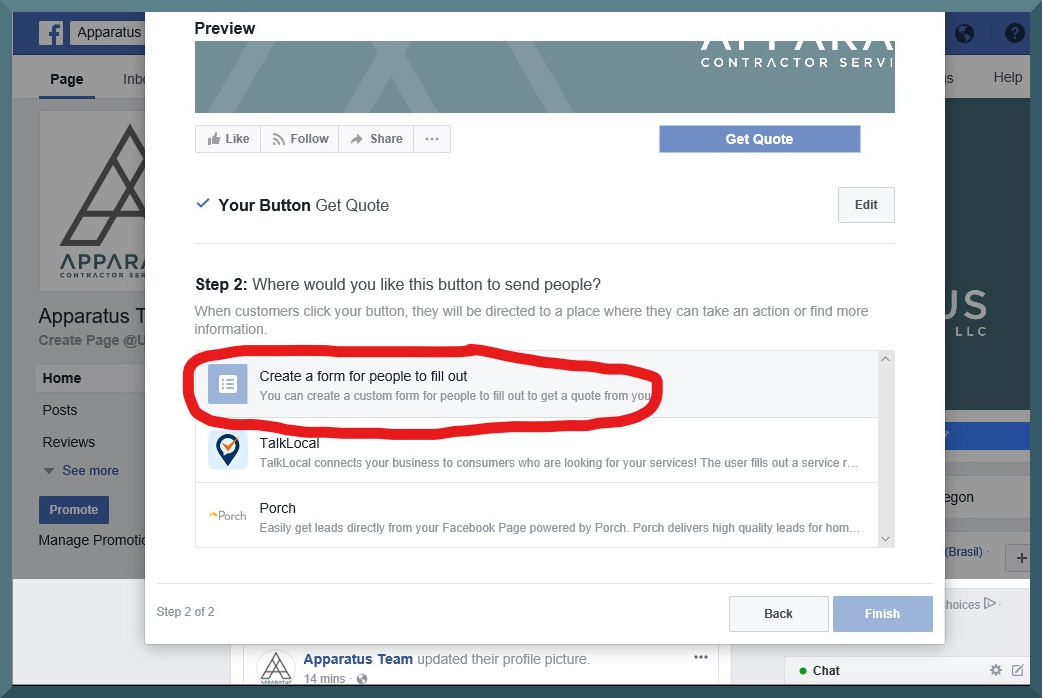
This will lead you to a form field, which will ask you what information you’d like to collect from your leads. We always, always recommend email as a required field. You can also enter any additional questions you’d like your prospects to answer here. Click “Next” when complete.

9. Click “Add Button” to place the button on your Facebook page and return to your homepage.
Publish a Post
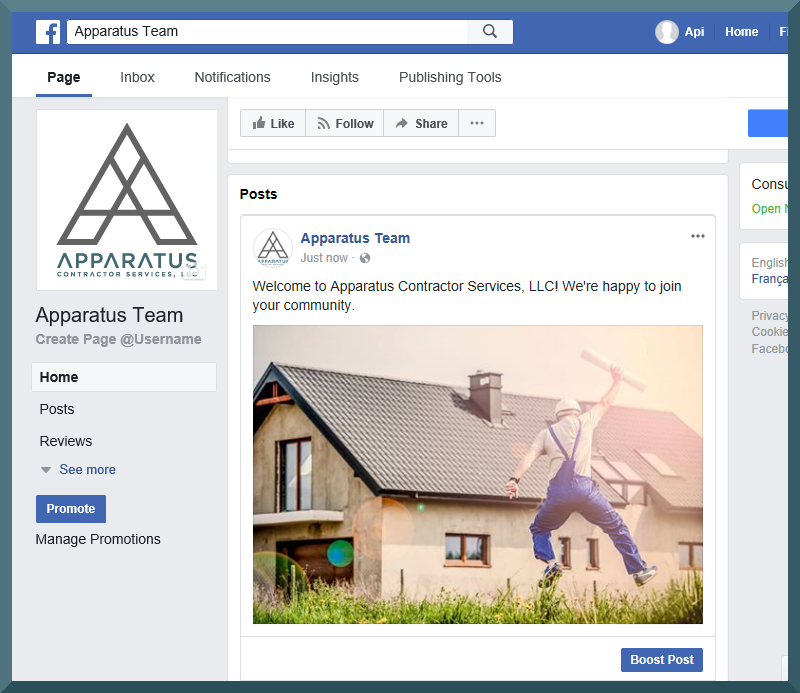
10. Click the empty text box labeled “Write something…” in the top center of your homepage. Write some text to introduce your business. To add pictures, do so by clicking the “Photo/Video” option just above the text field.
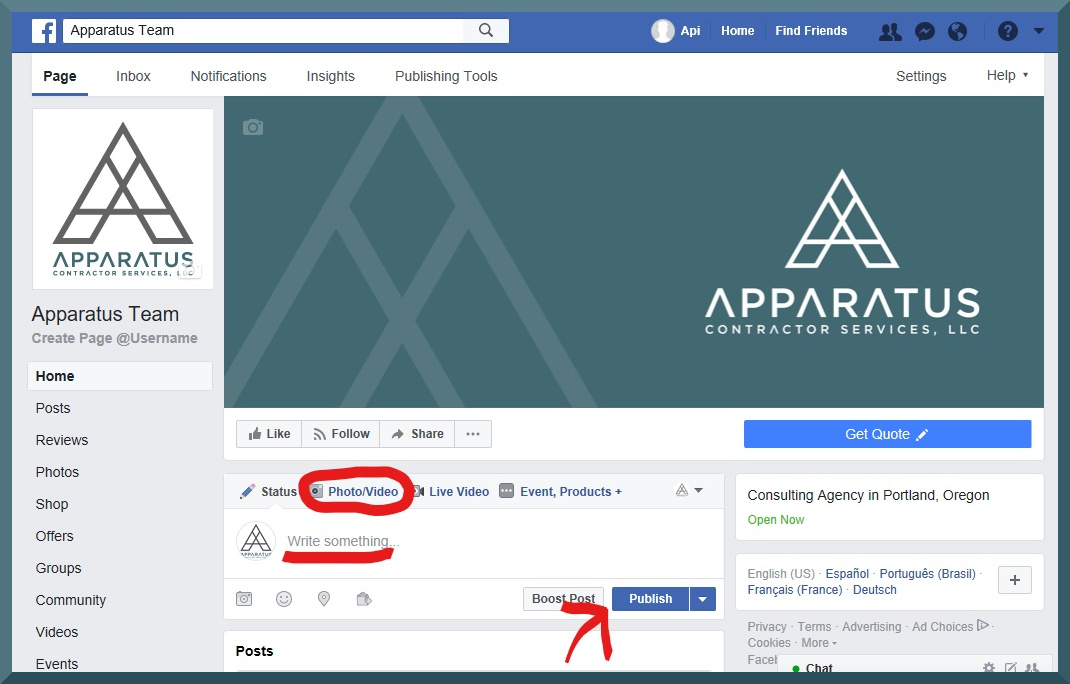
11. Click “Publish” to send your first business post live!
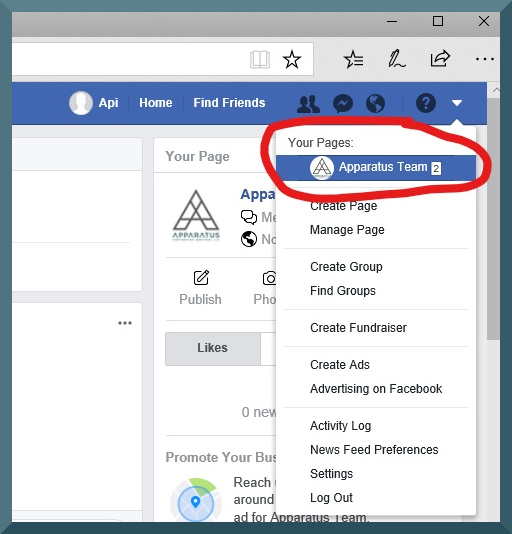
12. Toggle back and forth between your personal and business pages by clicking the menu options in the upper right-hand corner.
From business to personal:
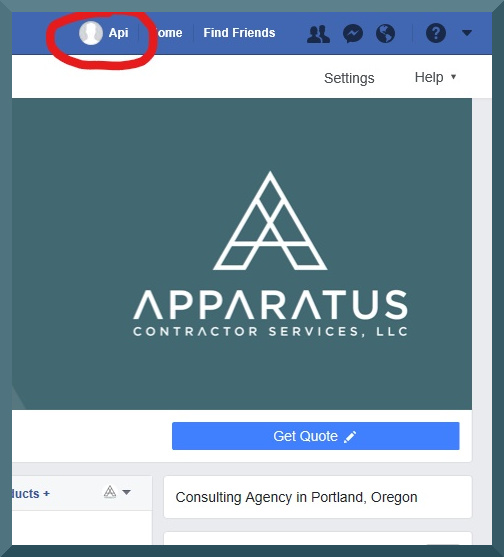
From personal to business:
Now that you’ve learned how to create a Facebook business page and made some digital space for your contracting company, the next step is to share your page with your friends and post regularly. Keep content relevant to your desired audience. You can share your page by including a link to it in any of your digital marketing: email, website, other social media, and more. You can also include a “Find us on Facebook!” tagline on any printed marketing or business cards.
Market your business in the New Year and beyond!
If you have questions about setting up your Facebook business page, we’re just an email away.
Visit Contractor Talk to access a peer-based open forum on all things contracting.